
Tesla, a company already known for its industry-evolving innovation throughout the last decade has a few features that stand out among the rest. Arguably the most important automotive feat since the creation of the radio comes TeslaCam, the built-in Tesla Dashcam and Sentry Mode features. Using their proprietary Autopilot cameras, owners are able to store and record live footage for peace of mind.
Index |
||
|---|---|---|
|
|
||
In short, TeslaCam is the name of Tesla’s overarching list of camera features. As you know (or should know), all Tesla’s sold today come built-in with eight cameras allowing for a full 360-view of the car’s surroundings. With the added luxury of twelve ultrasonic sensors and a forward-facing radar, Tesla has been able to accomplish many new technological feats. The most notable of course being Autopilot and the eventual Robo-Taxi’s.

In the time between now and full autonomy, Tesla has found ways to make additional use of these systems and add features via their famous Tesla software updates. The initial Tesla Dashcam feature was released in late 2018 with V9 but as the months went by and updates came flooding in, what began as a simple way to allow owners to store accident data become much more.
TeslaCam now houses three distinct features:
- Tesla Dashcam – The equivalent of four dashcams built right into your Tesla
- Sentry Mode – Receive security notifications and store footage of objects nearing your vehicle while away
- TeslaCam Viewer – View all of your recordings and angles from right within your car
If you’re lucky, the TeslaCam setup is no longer than a 30-second process. For those having issues with the Tesla Dashcam install or simply need TeslaCam instructions, you can find both below. However, for those looking for the best way out, there’s an even easier option.
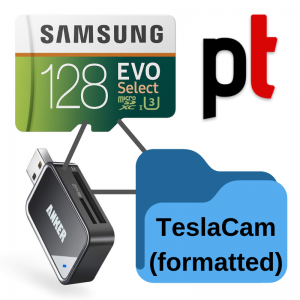
To set up your Tesla Dashcam just create a folder on your USB named ‘TeslaCam’. If you have any issues, lack an available USB, or you see below that your device is not compatible, purchasing a preformatted Tesla USB might be the best option for you.
Doing it yourself is by no means difficult but if you want the easy way out, check out our friends at PureTesla. As a simpler solution, they provide a ready-to-go package to get your TeslaCam USB working with a fraction of the effort. With everything pre-installed to get your Tesla Sentry Mode setup and dashcam working, it’s as simple as plugging it in and driving away.
- 35 GB of space
- FAT32, FAT, or EXFAT format
- A fast USB write speed
Car Compatibility
- Hardware 2.5
- – Any Tesla built in or after August of 2017, or any Model 3/Y.
- A Tesla USB Drive
- Any Computer
- This TeslaCam format guide
- – Tesla recommends a minimum of 35 GB but anything above 1.8 GB will technically work
Through OTA Tesla is able to continuously add features improving the ownership experience as your car ages. However, hardware limitations are in place. In 2017 Tesla introduced Autopilot Hardware 2.5 (HW 2.5) and MCU2, both impacting your TeslaCam capabilities. In April of 2019, Tesla introduced HW 3, maximizing TeslaCam’s potential.
MCU1 will still allow your Tesla to use its dashcam and Sentry Mode features with limitations. Owners with MC1 will have no Dashcam Viewer access. Instead, you will need to disconnect your TeslaCam USB (or Tesla Sentry Mode USB) to view your recorded footage.
Tesla’s with HW 2.5 will also have a single limitation; no access to the rearview camera. Anything below HW 2.5 will not be able to use TeslaCam’s features.
In both cases, all of the TeslaCam suite will run slower and at a generally lower quality when compared with newer vehicles. For full access to all of what TeslaCam currently has to offer, your car must be built after April of 2019 with both HW3 and MCU2.
The company does offer options to retrofit both for older cars. If you purchase the FSD package your car will be upgraded to HW3 and if you purchase the infotainment upgrade, your car will be upgraded to MCU2.
If you’re in no rush, the new 2021 Model S refresh is rumored to bring MCU3. While nothing has been confirmed, a retrofit with the latest hardware can be expected to become available.
Tesla Dashcam instructions are for the most part self-explanatory. Just create a root Tesla Dashcam folder named ‘TeslaCam‘ and you’re done. Plug it into the front USB port in your Tesla and if everything went well, you now have the Tesla Dashcam setup.
In some cases, whether it be an unsupported Tesla Dashcam format or not enough space, you could have trouble getting TeslaCam to work.
The TeslaCam USB Setup might sound tiresome at first but it’s anything but. In the past, the TeslaCam USB format would cause trouble for some. Through the magic that is OTA, Tesla introduced an easy solution for all. You can now change your Tesla Dashcam format directly from within the car.
To do so, with your USB plugged in, navigate to your car’s ‘Safety and Security‘settings and find ‘Format USB Drive‘.

Note: Formatting your TeslaCam USB will remove all data on the USB stick so if you aren’t using a brand new USB, be certain you’ve backed up all important data prior to beginning.
With this new system in place, the Mac TeslaCam setup and USB format are the same as they are for Windows users.
Assuming your TeslaCam USB is not corrupted, this should fix any issues you’re having. This won’t however create the TeslaCam folder on your behalf. After reformatting you will have to take the USB back to a computer and add the ‘TeslaCam’ folder.
If your Tesla Dashcam is still not working, the issue is more than likely your USB. Possible issues include inadequate storage, incompatible format, or an outdated and slow USB.
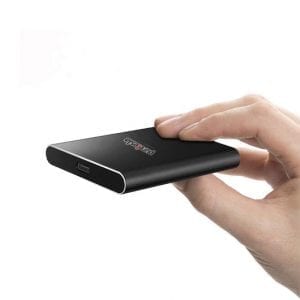
For the most part, any new USB will do the trick. The more storage you provide, the more footage you can save. The Tesla Dashcam USB size is recommended to be a minimum of 35 GB but as little as 1.8 GB will technically work with minimal functions. For those who want to maximize their dashcam and Sentry Model usage, a TeslaCam SSD is recommended.
Regardless of what size you choose, you shouldn’t go for something found in a dollar store bin. TeslaCam requires a meager 4 MB/s write speed but that’s only half the story. Because the system is constantly running your USB option should be something that can sustain 4 MB/s over long periods of time.
The company itself offers a basic 128 GB Tesla USB Stick for those who want to keep it simple, but it’s not the best. The best USB for Tesla Dashcam would be a MicroSD reader as the faster write speed will prevent corrupted and jaggy footage.
[/columns]
[columns size=”1/2″ last=”true”]
[/columns]
Note: The Tesla Branded USB is just a rebranded Samsung Bar Plus (half the price).
Meanwhile, the best USB for Tesla Sentry Mode isn’t a USB at all, it’s an SSD. The extra storage will allow you to keep your car under Sentry Mode 24/7 with no worries of running low on space.
Tesla USB Hub – Teslacam and Sentry Mode require you to sacrifice a USB port. If you’re someone who needs a spare USB port to charge a second phone or use a controller for the Tesla Arcade, a Tesla USB splitter is recommended.
Music on USB – If you listen to music via USB, a splitter can also be helpful but isn’t necessary. It is possible to use TeslaCam and music on the same USB but the process is more technical. Using a partition manager, you must create a second partition for your music, leaving the TeslaCam folder on the primary.
A Better USB – A better USB can be classified as one with more storage space and a faster write speed. While more storage space will of course allow you to keep more footage, a faster write speed will prevent corruption and generally record better. A lot of issues with TeslaCam can simply be resolved with a better USB. An SSD for Tesla Sentry Mode is recommended as the feature can consume a lot of storage quickly.
With a working Tesla Dashcam USB (or Tesla Dashcam SSD) plugged in, your car will automatically record and save everything it sees.
The system concurrently records from four different angles for an optimal, unobstructed, view of its surroundings. The cameras, front, right repeater, left repeater, and rear are just four of the eight onboard cameras used for Tesla’s dashcam and Sentry Mode. These cameras simultaneously give your Tesla the autonomous abilities found in Autopilot and FSD.
Below are some TeslaCam icons you should familiarize yourself with:
| Currently recording (tap to save) | Saving | ||
| Save successful | Error, not recording | ||
| Sentry Mode available (tap to enable) | Sentry Mode disabled (possible error) | ||
| Tesla Sentry Mode Activated | Notification (tap to view) | ||
| Dashcam Viewer (tap to view) | Dashcam Viewer files |
The working concept behind the Tesla Dashcam is simple. While the car is on and in drive it uses the forward-facing, rear, and two side cameras to record. There’s no need to toggle anything on or off, as long as you see the red indicator on your car’s top-right display, the system is running properly.
Everything is being recorded and saved as you drive. When your USB runs out of space, the car will automatically delete and overwrite older footage. If you’d like to permanently save a clip, just tap the red indicator to capture the previous 10 minutes of driving. The quality isn’t as good as a $500 dashcam but it’s still very useful and best of all, free.
In a recent update, Tesla added the ability to save clips after a horn honk. To enable the feature, navigate to your car’s ‘Safety and Security‘settings and find ‘Save Clips on Honk‘.
If you find your Tesla Dashcam not recording, the problem can almost always be caused by one of these issues:
Improper Format: To format, plug your USB into the front USB port and navigate to your car’s ‘Safety and Security’ settings. From there, find and press ‘Format USB Drive’. After formatting, you’ll need to take your USB to a PC and add a folder named ‘TeslaCam’.
Slow Write Speed: TeslaCam requires a write speed of 4 MB/s. However, with continuous use, you need a USB capable of running at 4 MB/s for long periods of time. We recommend a MicroSD or a high powered USB.
Not Enough Storage: Once you run out of storage space, you’ll receive an error noting that your Tesla Dashcam USB is full. You can manually delete footage from within the TeslaCam viewer or mass delete by taking the TeslaCam USB to a PC and deleting the contents of the Tesla Dashcam folder. To prevent storage issues, we recommend a compatible SSD.
Vehicle Error: Sometimes the issue lies within the car itself. Unplug your USB and reset your MCU by holding down both scroll wheels on your car’s steering wheel for approximately 30 seconds. Once the car reboots, plug your USB back in.
Corrupt USB: If your format is proper and everything else is compatible, the issue could simply be a broken or corrupt USB. In this case, the only option would be to purchase a new device. We recommend one already preformatted and confirmed as compatible from PureTesla.
After you have your Tesla Dashcam USB setup you’ll receive access to a new feature dubbed Tesla Dashcam Viewer. With it, you can access and review all saved footage right from within your car’s interface. To access the hub you must press the Tesla Dashcam icon with your car in park. From there you’ll see a secondary icon to access the viewer.
Because the system records from four cameras simultaneously, the company has designed a viewer allowing you to watch the footage alongside each other. The all-in-one feature allows you to fast-forward, save, or even delete the most recent clip. You can even swap between cameras at ease in live time while viewing all four videos simultaneously. To expand a specific side, just tap its corresponding box.

The Tesla Sentry Mode viewer is found here as well with your Sentry Mode and dashcam recordings both separated into their own folders.
You could also pull the Tesla USB out and view the footage on a computer but doing so often is not recommended. Repetitively disconnecting and connecting the USB has previously caused corruption issues for some.
The TeslaCam viewer is only available on cars with MCU2 (any Tesla built after March 2018).
In early 2019, Tesla added to the TeslaCam feature set with Sentry Mode. The feature takes the concept behind the Tesla Dashcam and allows you to record not just while driving, but also while in Park.
According to federal statistics, there was an estimated one motor vehicle theft or attempted theft every 40.8 seconds in the United States in 2017— and that doesn’t even include the vast number of car break-ins that happen nationwide. To further enhance the security of our vehicles and give our customers additional peace of mind, today we’re starting to roll out a new safeguard – Sentry Mode – to protect against break-ins and theft.
With the always-running free-to-use system, owners have been able to capture some gnarly accidents, prove insurance fraud, and even help identify hit and run suspects.
How Does Sentry Mode Work?
The feature works only while your vehicle is in Park and only if enabled. When enabled, Sentry Mode enters a standby state. Using the available radars and sensors, the car looks for objects nearing the vehicle. When the said object enters within questionable range, Sentry Mode activates, displays a warning message on the center display, and begins recording.
If a severe incident occurs, such as the car moving or a window breaking, an external alarm goes off and the car’s speaker begins playing at maximum volume. The Tesla owner is then notified via a phone notification and can review the collected footage via the Tesla Sentry Mode Viewer.
Because Sentry Mode requires your car’s cameras and sensors to remain on, it requires some energy consumption. Tesla owners can expect to lose one to two miles of range per hour with Sentry Mode activated. If left on 24/7, this results in significant energy loss. You can however use Sentry Mode while plugged in to prevent lowering your available range next time you step in the car.
The company has made this must-have element as simple as possible. Because all the features are housed under the ‘TeslaCam’ name, the Tesla Sentry Mode USB setup is done simultaneously with the rest. Just use a compatible and properly formatted TeslaCam USB and create a folder named ‘TeslaCam’.
The Tesla Sentry Mode USB format rules are identical to the rest of the suite. FAT32, FAT, or EXFAT is required with a minimum of 35 GB recommended. A USB capable of excessive use at a 4 MB/s write speed is an additional requirement for proper Sentry Mode video captures.
Using Sentry Mode
Thanks to continuously evolving software, Tesla Sentry Mode instructions are as easy as can be. Because of the energy consumption, the feature is not activated by default. There are two options for using Sentry mode; setting it up to be enabled by default, or enabling it manually when wanted.
To have Sentry Mode enabled by default navigate to your car’s ‘Safety and Security‘settings and find ‘Sentry Mode‘. From there you can toggle its default status to On or Off. Using your car’s GPS functions, you can opt to keep the feature off when at home, work, or at your saved favorites. This would only allow the feature to be triggered On at locations not recognized unless manually overridden.
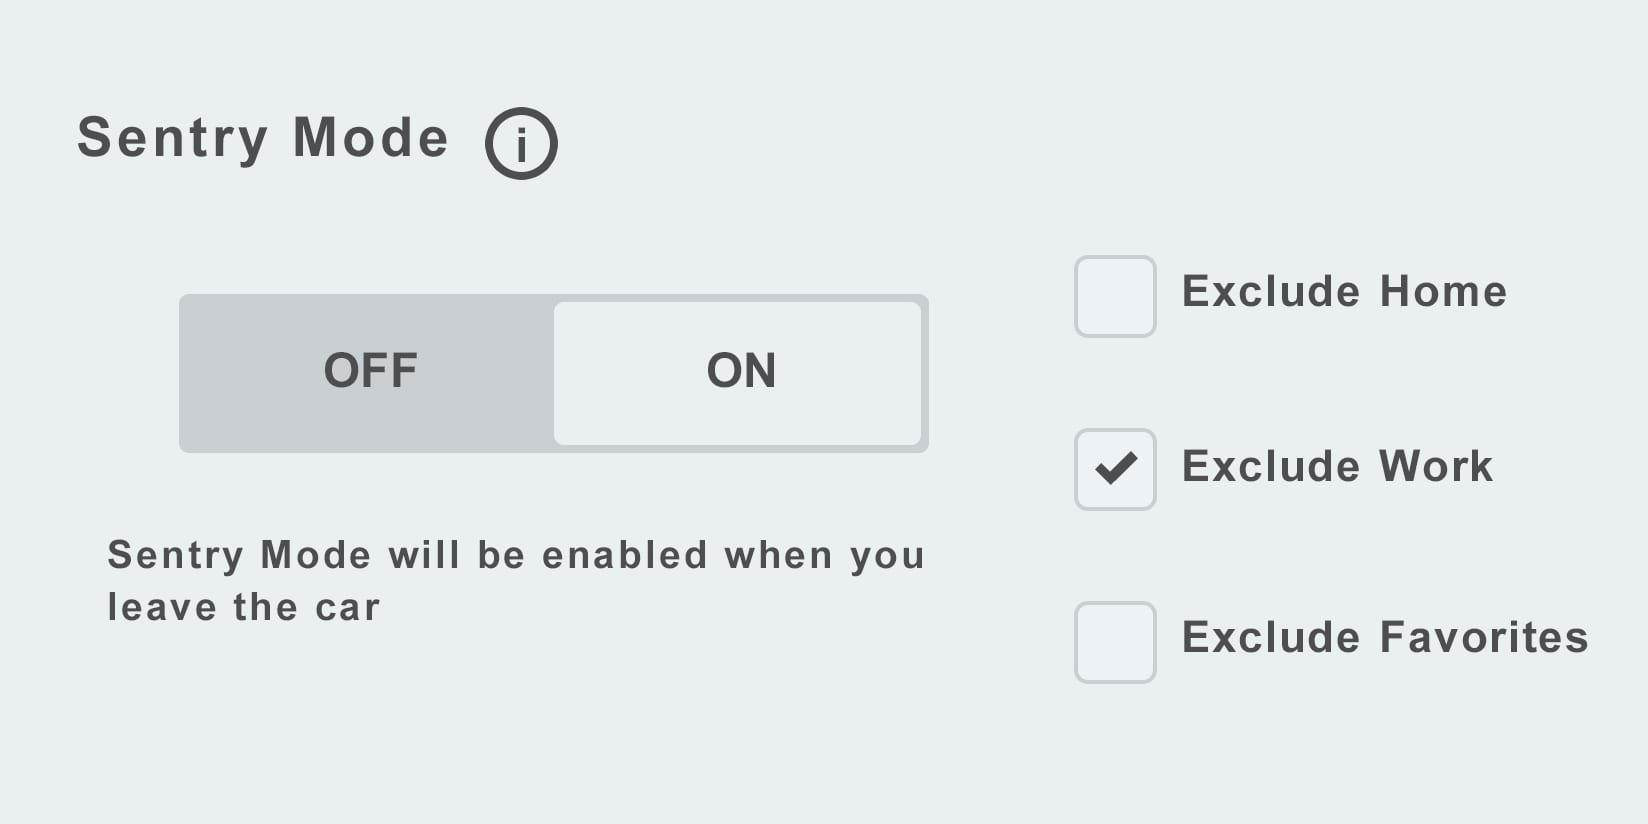
If you’d like more control of when Sentry Mode is used, leave the feature disabled in the settings. Instead, to manually turn the feature On, press the Tesla Sentry Mode icon found at the top of the display. Because the Tesla Sentry Mode feature only works while in Park, you will need to be parked to see the icon. If enabled properly, the icon should shift to a red center indicating that the recording is in progress.
Additionally, you can enable Sentry Mode while away from the car from within the Tesla app. The feature can be found and toggled on under the Controls section.
Thanks to the latest Tesla Sentry Mode update, Tesla Sentry Mode footage is stored in the same place as your dashcam footage, in the TeslaCam Viewer. The two categories are separated and dated allowing for easier search and playback.
The process to use Sentry Mode is the same throughout all of Tesla’s vehicles. The Tesla Model S, Model X, Model 3, and Model Y all have the same TeslaCam functions and instructions.
Because the system is sensitive, Tesla Sentry Mode catches will pile up quickly. If you look to frequently use Sentry mode, or even permanently keep it enabled, you’ll find yourself constantly having to manually erase unwanted footage. To prevent this, we recommend using an SSD instead of a USB. An SSD will provide additional storage space and will generally operate better than a USB, with its faster write speed and better durability.
Formating an SSD for Tesla Sentry Mode is done in the same process as a USB, in your Tesla’s settings. FAT32, FAT, or EXFAT format for TeslaCam with a 4 MB/s write speed is required. From there you just need to name a folder on your Tesla Sentry Mode hard drive named ‘TeslaCam’ and you’re done. Just plug the SSD in and enable Sentry Mode as needed.

With the TeslaCam viewer, reviewing and removing footage from within your car is as simple as could be. However, under certain scenarios, you might find it best to view your footage externally. To do so simply disconnect your USB from the car and plug it into a computer. All of the recorded footage can be found in the TeslaCam folder.
Footage will be organized by date for convenience. Both the Tesla Dashcam and Sentry Mode record in short 1-minute intervals. Even when saved, you’ll have ten minutes of footage separated into ten different files for each of the four cameras. Because of this, reviewing footage externally can be troublesome. An easy workaround would be using a Tesla Dashcam app.
TeslaCam Web Player – An easy web-based solution bringing the ease of Tesla Viewer to your computer.
Mobile TeslaCam App – Using a special USB and a community approved Tesla Sentry Mode app (available for purchase with the USB), you can access your saved footage on any IOS or Android device.
TeslaCam RaspberryPi – With the blank canvas that is a Raspberry Pi, owners have found ways to create their own Tesla dashcam devices with custom features.
A Better Tesla Dashcam
For most people, TeslaCam’s features extend well past the average daily needs. However, in some cases, it may not be enough. Whether you’re running on an older system with outdated and inconsistent recording quality or just want the best possible, better external Tesla dashcams do exist.
Screenshots via DÆrik’s YouTube Channel
A popular dashcam company that gets recommended regularly is BlackVue, specifically the DR750S and the DR900S.
When comparing a Blackvue to Tesla’s built-in dashcam, you’ll quickly note each systems benefits. A stand-alone dashcam can have a much higher quality and field of view at the sacrifice of aesthetics. While Tesla offers four cameras built directly into their vehicle, their peripherals are narrow. The BlackVue offers a front and rear camera at much wider angles and higher quality.
Of course, there is nothing stopping owners from doubling down the precaution and using both systems simultaneously. It’s also a considerable mention for owners with MCU1 or those below HW3 who are already lacking many of TeslaCam’s features and running at a much lower camera quality.
[sc_fs_multi_faq headline-0=”h2″ question-0=”What is Tesla Sentry Mode?” answer-0=”Sentry Mode is a Tesla feature further enhancing safety and security. With it enabled, the car’s onboard cameras and sensors actively monitor for suspicious activity, recording and notifying the Tesla’s owner.” image-0=”” headline-1=”h2″ question-1=”How do you view Tesla Sentry Model Videos?” answer-1=”Sentry Mode recordings can be viewed inside the Tesla via the car’s Dashcam Viewer, sent to a PC, or be viewed on a mobile device with a compatible app.” image-1=”” headline-2=”h2″ question-2=”What does Tesla Sentry Mode do?” answer-2=”Enabling Sentry Mode puts your vehicle in a standby state where it actively monitors threats. If someone begins approaching your vehicle, Sentry Mode begins to record and displays a warning message on the center display. If the car shifts positions or a window breaks, an alarm will sound both internally and externally with the owner of the vehicle notified.” image-2=”” headline-3=”h2″ question-3=”How does Tesla Sentry Mode work?” answer-3=”Sentry Mode uses four onboard cameras and sensors to monitor and record its surroundings while you’re away from the vehicle. If the car detects someone approaching, it will start recording. If a more severe threat is detected, alarms will sound and the owner will be notified.” image-3=”” headline-4=”h2″ question-4=”Can Tesla use exFAT?” answer-4=”TeslaCam can use FAT32, FAT, or exFAT format. The recommended USB requirements are 35 GB of space with a 4 MB/s write speed.” image-4=”” headline-5=”h2″ question-5=”Why is my Tesla Dashcam not working?” answer-5=”Resetting the vehicle in some cases can resolve the issue without further inspection. There’s only a handful of possible issues resulting in an inoperable Tesla dashcam. Improper formatting, a slow write speed, lack of storage, or a corrupt USB.” image-5=”” headline-6=”h2″ question-6=”How do you format a USB for Tesla Dashcam?” answer-6=”You can change your Tesla Dashcam format from right within the vehicle. With the USB plugged in, navigate to your car’s ‘Safety and Security’ settings and find ‘Format USB Drive‘” image-6=”” count=”7″ html=”true” css_class=””].
1 comment
Great article, however I am missing instructions on how to set up the flash drive so that I can store music files and boombox files together with sentry/dashcam footage?